Wind Up Box Scene Drawer
I received an inquiry from someone request if SketchUp could be used to design bandsaw boxes. Although I hadn't really thought about doing so, I realized that it would piece of work well for this. Ofttimes all yous every come across of a bandsaw box blueprint is a 2d cartoon which you can apply as a blueprint but it doesn't really tell y'all much about how the finished thing would look. In SketchUp y'all could design the box in 3D and then create the needed 2nd views for the patterns which tin be printed and glued to the forest. Designing in 3D will allow y'all get a amend feel for how the whole thing volition look from unlike angles. It would also go far easy to sort out the order of cuts that you demand to brand along with the society of assembly.
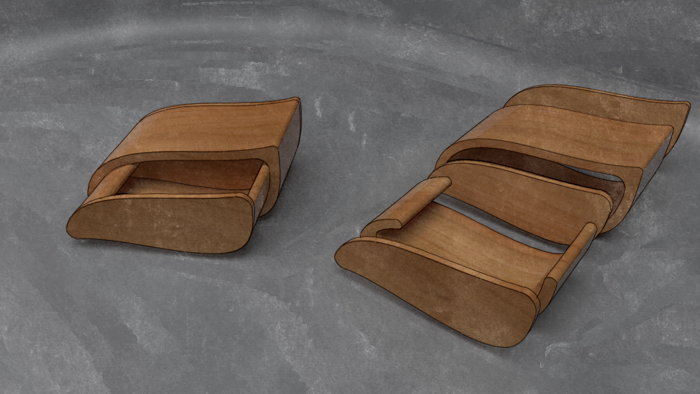
I drew a uncomplicated picayune bandsaw box showing a procedure that seems to be straightforward and efficient. I made components of each part of the box as I went and made frequent use of Edit>Re-create and Edit>Paste in place. I too used Offset and, to drawn the inital curves, a plugin called Bezier.rb which y'all can download from here. In that location's some other curve-cartoon toolset called BZ Spline which offers a number of types of curves in add-on to the archetype Bezier. Either will piece of work. Y'all could employ the Arc tool equally well simply I recollect you'd find it difficult working with it to draw the nice flowing curves typical of bandsaw boxes.
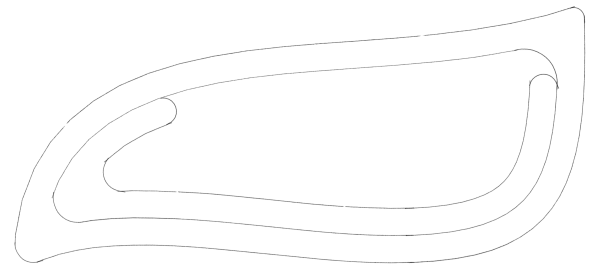
Y'all might notice that I didn't draw the entry cut for the saw blade nor did I go out a saw kerf. You can certainly depict those details in if you wish. The entry cut would be drawn as an extension of i of the interior curves. To create the saw kerf you could use Starting time on the edges of the drawer front to describe a second bend a few 32nds in and then delete the outer curve of the drawer front. You lot might wind up with something like this.
One time you've got the bandsaw box drawn to your satisfaction, you can create the needed views of information technology including an exploded view. Since each function is a component, information technology'southward a unproblematic matter of dragging them away from each other with the Move tool.

If you exercise make an exploded view, you might find it wise to explode a re-create of the model so you tin can exit yourself an assembled version.

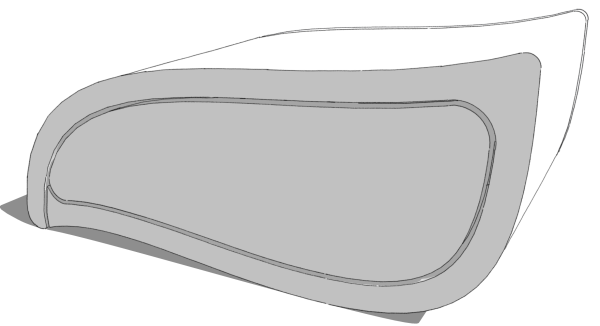
Maybe you lot'll need to print a blueprint to accept to the shop. The first thing to practice in SketchUp is create a scene using the correct Standard view with the camera set to Parallel Project. Use Zoom extents to fill the drawing window with the model and you should meet something like this:
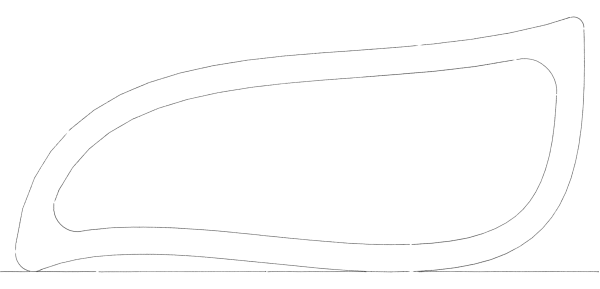
I hid the drawer front end then I could also meet the shape of the drawer box.
Now to get it printed so information technology is useful, yous could do several things. Y'all could consign the image and use something like Photoshop to resize the image to become it to the correct size for printing. If you accept SketchUp Pro, y'all could ship the scene to LayOut, set the scale to 1:one and so export a PDF file with the drawing at the proper size. It would be like shooting fish in a barrel enough to make the pattern run over several pages if needed and if y'all were creating the patterns for others, yous could create an unabridged parcel for them with other views, instructions and any other content you want to include.
It seems near woodworkers are using the free version of SketchUp and then LayOut won't be an option. There are several alternatives to get the pattern printed out at full size. You tin can print straight from SketchUp. I've described two methods here. Or you could use a plugin called gk_Postscript_Plot by Geoff Kime to create Postscript files for the job.
A note on housekeeping
When I was drawing the drawer in the video I mentioned I was creating a messy file. In the involvement of keeping the model make clean and easier to work with, we should really fix this up. Information technology merely takes a few seconds to do but if you have whatsoever editing to practice later, you'll find this time well spent.
As I went along making the parts of the drawer I was creating nested components. You tin see the structure in the outliner, beneath.

Within the drawer component I take the drawer front and so, wrapped together, I have the 'drawer box inner' and the 'drawer back'. This means that to get to the drawer box or the drawer back to edit one of them, I would need to open 3 "wrappers" while editing the drawer front would crave merely opening two wrappers. Past only exploding the component I chosen 'Drawer box', I now have the three parts of the drawer wrapped in a single common wrapper. In this uncomplicated model that isn't a huge modify just if the model had many more parts, this cleaner arrangement would make dealing with the model for changes much easier.

If bandsaw boxes are something that interests you, requite this a try and run into what you lot go.
Dave
Source: https://www.finewoodworking.com/2013/03/30/designing-a-bandsaw-box